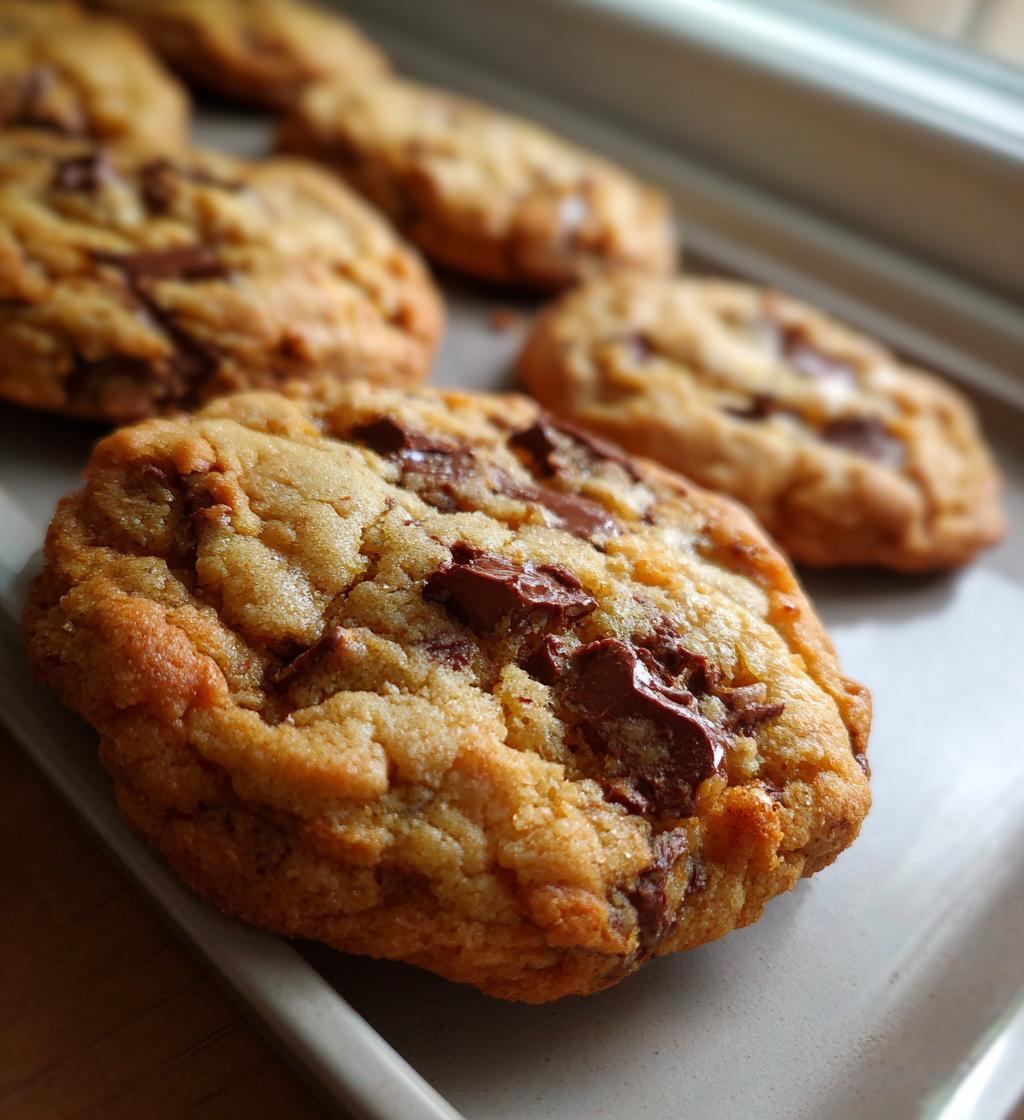
Oh, the joy of baking milk cookies! Just thinking about them makes my heart skip a beat. These delightful cookies are so soft and chewy, and they practically melt in your mouth! I remember as a kid, I’d sneak into the kitchen while my mom baked these treats, the sweet aroma wrapping around me like a warm hug. I’d wait impatiently by the oven, watching through the glass as they puffed up and turned golden brown. The best part? Dipping a still-warm cookie into a tall glass of cold milk. Trust me, it’s an experience you won’t want to miss!
These milk cookies are perfect for any occasion, whether you’re celebrating a birthday, hosting a cozy gathering, or just treating yourself after a long day. The combination of buttery goodness and chocolate chips creates a flavor explosion that’s simply irresistible. So, roll up your sleeves, grab those ingredients, and let’s get baking these scrumptious milk cookies together!
Ingredients List
Alright, let’s gather everything we need to make these delicious milk cookies! Here’s what you’ll want to have on hand:
- 1 cup unsalted butter, softened: Make sure it’s soft enough to cream easily with the sugars. Leave it out on the counter for about an hour before you start baking.
- 1 cup granulated sugar: This adds sweetness and helps create that perfect chewy texture.
- 1 cup brown sugar, packed: Use the dark variety if you want a deeper flavor. Pack it firmly into the measuring cup for the best results!
- 2 large eggs: Fresh eggs are crucial for binding everything together. Let them sit at room temperature for a bit if you can.
- 2 teaspoons vanilla extract: This is where the magic happens! It adds a warm, comforting flavor that pairs beautifully with the chocolate.
- 3 cups all-purpose flour: Make sure to spoon and level it in your measuring cup to avoid heavy cookies.
- 1 teaspoon baking soda: This gives your cookies a nice lift, making them soft and airy!
- 1 teaspoon salt: Don’t skip this! It enhances all the sweet flavors and balances the taste.
- 2 cups chocolate chips: Go for semi-sweet or milk chocolate, depending on your preference. These are the stars of the show!
That’s it! Simple, right? These ingredients come together to create something truly special when mixed with love and care. Now, let’s get ready to bake!
How to Prepare Milk Cookies
Now that we’ve gathered all our ingredients, it’s time to bring them together and create the magic of milk cookies! Follow these simple steps, and you’ll be on your way to cookie bliss.
Step-by-Step Instructions
- Preheat your oven: First things first, let’s get that oven warmed up! Preheat it to 350°F (175°C) so it’s nice and ready when our cookie dough is mixed.
- Cream the butter and sugars: In a large mixing bowl, add the softened butter, granulated sugar, and brown sugar. Using a hand mixer or a sturdy wooden spoon, cream them together until the mixture is smooth and fluffy. This should take about 2-3 minutes. Trust me, this step is crucial for that chewy texture!
- Add the eggs and vanilla: Beat in the eggs, one at a time, making sure each is fully incorporated before adding the next. Then stir in that heavenly vanilla extract. The batter should start to look rich and creamy.
- Mix the dry ingredients: In another bowl, whisk together the flour, baking soda, and salt. This helps to ensure everything is evenly distributed, so your cookies rise uniformly.
- Combine wet and dry ingredients: Gradually add the dry mixture to the wet mixture. I like to do this in three parts, alternating with mixing until just combined. You don’t want to overmix, or your cookies could end up tough.
- Fold in chocolate chips: Now for the best part! Gently fold in the chocolate chips using a spatula, ensuring they’re evenly distributed throughout the dough.
- Scoop the dough: Using a tablespoon or a cookie scoop, drop heaping spoonfuls of dough onto ungreased baking sheets, leaving about 2 inches of space between each cookie. They’ll spread out nicely while baking!
- Bake to perfection: Pop those trays into the preheated oven and bake for about 10-12 minutes. Keep an eye on them; you want the edges to turn golden brown, while the centers stay soft and slightly underbaked.
- Cool down: Once baked, remove the cookies from the oven and let them cool on the baking sheet for about 5 minutes. This helps them set before transferring them to wire racks to cool completely.
And there you have it! The steps may seem simple, but each one is a little piece of the puzzle that makes these milk cookies so special. Enjoy the warm, sweet smell wafting through your kitchen as you prepare to indulge in these delightful treats!
Tips for Success
Now that you’re all set to bake those scrumptious milk cookies, let me share some of my best tips to ensure your cookies turn out perfectly every single time. I’ve learned these the hard way, so you don’t have to!
Timing is Everything
First off, don’t rush the chilling process! If you have a little extra time, pop your dough in the fridge for about 30 minutes before scooping it onto the baking sheets. This helps control the spread and gives you thicker, chewier cookies.
Watch the Oven
Keep a close eye on your cookies as they bake. Every oven is different, and it’s easy to accidentally overbake them. Remember, they’ll continue to cook a bit after you take them out of the oven, so pulling them out when they’re just set in the center is key. You want that delightful soft bite!
Experiment with Texture
If you’re after an even chewier cookie, try adding an extra egg yolk. It adds moisture and richness that can elevate your cookies. Alternatively, if you prefer a crispier edge, just bake them a minute or two longer.
Mix it Up
Don’t be afraid to play with flavors! Want a hint of spice? Add a teaspoon of cinnamon or a sprinkle of nutmeg. Feeling adventurous? Try substituting half the chocolate chips with butterscotch or white chocolate. The sky’s the limit!
Uniform Size for Even Baking
For cookies that bake evenly, try to keep the size consistent. Using a cookie scoop helps with this, but if you’re using a spoon, just make sure each scoop is about the same size. This way, they’ll all finish baking at the same time!
Store Wisely
Once your cookies are cooled and ready to enjoy, store them in an airtight container to keep them soft. A slice of bread in the container can help maintain that delightful chewiness. Just trust me on this one!
With these tips in your back pocket, you’re well on your way to baking the best milk cookies ever! So go ahead, dive in, and make those sweet memories in your kitchen. Happy baking!
Variations
Now that you’ve mastered the classic milk cookies, let’s get creative! There are so many fun ways to tweak this recipe and make it your own. Here are some of my favorite variations that will keep things exciting and delicious!
Add Nuts for Extra Crunch
If you love a little crunch in your cookies, consider adding some chopped nuts! Pecans or walnuts work wonderfully here. Just about a cup mixed in will give you that lovely texture contrast. Make sure to toast them lightly beforehand for an extra burst of flavor!
Switch Up the Chocolate
Why stop at just one type of chocolate? Mix things up by using a combination of semi-sweet, milk chocolate, and even dark chocolate chips for a richer flavor. Or, if you’re feeling adventurous, try adding white chocolate chips for a sweet twist. You can even chop up your favorite chocolate bar and use that for a gourmet touch!
Incorporate Flavor Extracts
Want to take your cookies to the next level? Experiment with different flavor extracts! Almond extract pairs beautifully with the vanilla for a nutty note, or try coconut extract for a tropical vibe. Just a teaspoon can transform your cookie dough into something extraordinary!
Mix in some Oats
For a heartier cookie, consider adding rolled oats to the mix. About a cup should do the trick! Not only do they add texture, but they also give a lovely chewiness that complements the chocolate perfectly. Plus, oats add a touch of wholesome goodness!
Make Them Gluten-Free
If you’re looking for a gluten-free alternative, swap out the all-purpose flour for a gluten-free flour blend. Just make sure it contains xanthan gum or add a little for structure. Your cookies might be a tad different in texture, but they’ll still be delicious!
Seasonal Flavors
Take advantage of seasonal ingredients! In the fall, you can add some pumpkin puree and a pinch of pumpkin spice for a cozy twist. Or, in the summer, throw in some chopped dried fruits like cranberries or apricots for a refreshing change. The possibilities are endless!
These variations allow you to customize your milk cookies to fit your mood and taste preferences. Don’t hesitate to experiment and find your perfect combination. Happy baking, and enjoy the delicious journey!
Storage & Reheating Instructions
Once you’ve baked these scrumptious milk cookies and they’ve cooled down, you’ll want to make sure they stay fresh for as long as possible. Here’s how to store them properly and keep that delightful softness intact!
Storing Your Cookies: Place your cooled milk cookies in an airtight container. This is super important to keep them from drying out. I find that stacking them with a piece of parchment paper between layers helps, too, so they don’t stick together. If you have any leftover cookies (which, let’s be real, is a rare occurrence!), they can last up to a week at room temperature!
If you want to keep them for a longer period, consider freezing them! Just make sure they’re completely cooled before placing them in a freezer-safe container or a resealable plastic bag. They should keep well for about 2-3 months. When you’re ready for a treat, let them thaw at room temperature, or pop them in the microwave for a few seconds to warm them up!
Reheating Tips: To bring back that freshly baked feel, you can reheat your cookies in the oven. Preheat your oven to 350°F (175°C), place the cookies on a baking sheet, and heat them for about 5 minutes. You’ll be greeted with that lovely aroma all over again! If you’re in a hurry, a quick 10-15 seconds in the microwave works wonders, too. Just be careful not to overdo it; you don’t want them to get tough!
By following these simple storage and reheating tips, your milk cookies will be just as soft and chewy as the day you baked them. Enjoy every last crumb, and don’t forget to pair them with that glass of milk for the ultimate experience!
Nutritional Information
Alright, let’s chat about the nutritional side of these delightful milk cookies! Now, I always like to remind you that these values are estimates and can vary based on the specific ingredients you use, but here’s a general idea of what you’re getting in each delicious cookie:
- Calories: Approximately 150
- Fat: Around 7g
- Protein: About 2g
- Carbohydrates: Roughly 20g
- Sugar: About 10g
- Sodium: Approximately 100mg
- Fiber: 1g
- Cholesterol: 20mg
These cookies are a sweet treat, and while it’s always fun to indulge, it’s good to enjoy them in moderation. So, whether you’re celebrating a special occasion or just treating yourself after a long day, these milk cookies are sure to bring a smile to your face! Happy baking and snacking!
FAQ Section
Got questions about milk cookies? Don’t worry, I’ve got you covered! Here are some common queries I often hear, along with my answers to help you navigate your baking journey.
Q1. Can I use different types of chocolate chips in my milk cookies?
Absolutely! Feel free to mix and match chocolate types. Semi-sweet, milk chocolate, or even dark chocolate chips all work beautifully in this recipe. You can even combine them for a fun flavor twist!
Q2. What should I do if my cookie dough feels too sticky?
If your dough is sticking to your hands or the bowl, don’t panic! You can add a little more flour, a tablespoon at a time, until it reaches a workable consistency. Just be careful not to add too much, or it can make your cookies dry.
Q3. How do I know when my milk cookies are done baking?
Great question! You’ll want to look for golden brown edges while the centers should look slightly underbaked. They’ll continue cooking a bit after you take them out, so don’t wait until they look fully set. A little softness is key for that chewy texture!
Q4. Can I freeze my milk cookie dough for later use?
Yes, you can! Just scoop the dough into balls and place them on a baking sheet until they’re frozen solid. Once frozen, transfer them to a freezer-safe bag or container. When you’re ready to bake, you can bake them straight from the freezer, just add an extra minute or two to the baking time.
Q5. How should I store my milk cookies to keep them fresh?
Store your cooled milk cookies in an airtight container at room temperature. To keep them soft, you can even add a slice of bread in the container. It really works wonders for maintaining that chewy goodness!
Q6. Can I make these cookies gluten-free?
Definitely! Just swap out the all-purpose flour for a gluten-free flour blend. Make sure it includes xanthan gum for structure. The texture might vary slightly, but they’ll still be delicious!
These FAQs should help you tackle any concerns you might have while baking your milk cookies. If you have more questions, feel free to reach out! Happy baking!
Print
Milk Cookies: 7 Chewy Delights That Make You Smile
- Total Time: 27 minutes
- Yield: 24 cookies 1x
- Diet: Vegetarian
Description
Delicious milk cookies that are soft and chewy.
Ingredients
- 1 cup unsalted butter, softened
- 1 cup granulated sugar
- 1 cup brown sugar, packed
- 2 large eggs
- 2 teaspoons vanilla extract
- 3 cups all-purpose flour
- 1 teaspoon baking soda
- 1 teaspoon salt
- 2 cups chocolate chips
Instructions
- Preheat your oven to 350°F (175°C).
- In a large bowl, cream together the butter, granulated sugar, and brown sugar until smooth.
- Beat in the eggs one at a time, then stir in the vanilla.
- In another bowl, combine the flour, baking soda, and salt.
- Gradually blend the dry ingredients into the wet mixture.
- Fold in the chocolate chips.
- Scoop tablespoons of dough onto ungreased baking sheets.
- Bake for 10-12 minutes until golden brown.
- Let cool on the baking sheet for 5 minutes before transferring to wire racks.
Notes
- Store cookies in an airtight container.
- Serve with a glass of milk for best experience.
- Can add nuts for extra crunch.
- Prep Time: 15 minutes
- Cook Time: 12 minutes
- Category: Dessert
- Method: Baking
- Cuisine: American
Nutrition
- Serving Size: 1 cookie
- Calories: 150
- Sugar: 10g
- Sodium: 100mg
- Fat: 7g
- Saturated Fat: 4g
- Unsaturated Fat: 2g
- Trans Fat: 0g
- Carbohydrates: 20g
- Fiber: 1g
- Protein: 2g
- Cholesterol: 20mg
Keywords: milk cookies, chocolate chip cookies, dessert