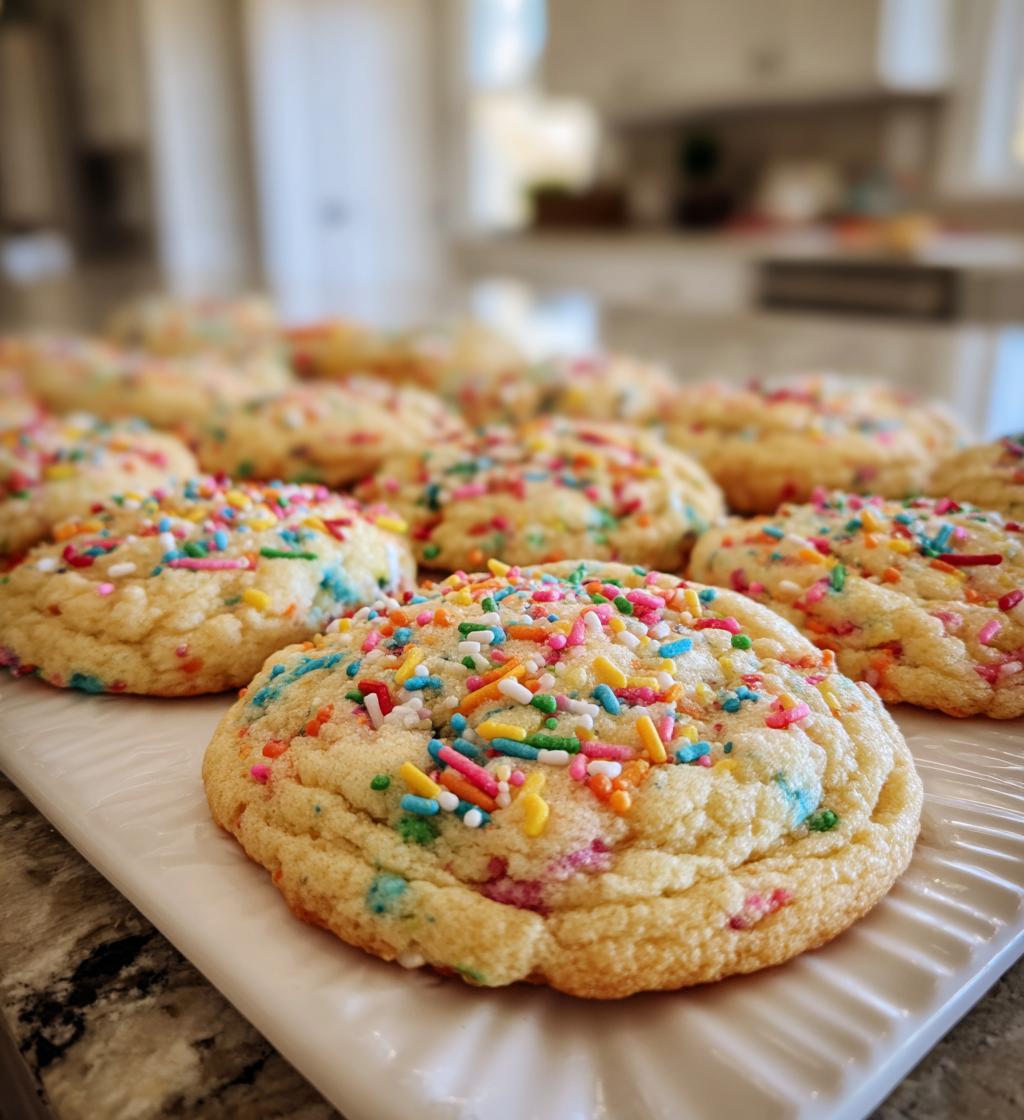
Ah, spring cookies! There’s just something magical about them, isn’t there? As the flowers start to bloom and the sun shines a little brighter, these delightful treats bring a splash of color and sweetness to any celebration. Whether you’re hosting a garden party, celebrating a birthday, or simply enjoying a sunny afternoon, these cookies are the perfect addition to your spring festivities.
I remember the first time I made these cookies for a family gathering. The kids went wild over the colorful sprinkles, and the adults couldn’t resist sneaking a few (or more!) as they chatted away. Honestly, it was such a hit that I’ve made them for every spring gathering since! They’re quick to whip up, and the best part? You can customize them with any sprinkles you have on hand, so they always feel fresh and exciting.
So, if you’re ready to dive into a world of sweetness that captures the essence of spring, let’s get started on these amazing spring cookies!
Ingredients List
Gathering the right ingredients is key to making these delightful spring cookies. Here’s what you’ll need:
- 2 cups all-purpose flour: Measured precisely, this is the foundation for your cookies.
- 1 cup granulated sugar: This will sweeten your cookies and give them a lovely texture.
- 1/2 cup unsalted butter, softened: Make sure it’s at room temperature for easy creaming!
- 1 large egg: This helps bind everything together and adds moisture.
- 1 teaspoon vanilla extract: A splash of this will enhance the flavor beautifully.
- 1/2 teaspoon baking powder: This is crucial for that delightful lift in your cookies.
- 1/2 teaspoon salt: Just a pinch to balance the sweetness.
- 1 cup colorful sprinkles: These add that fun, festive touch that screams spring!
With these ingredients in hand, you’ll be well on your way to baking up a batch of cookies that will brighten any occasion! Let’s move on to the preparation steps so you can get these beauties in the oven.
How to Prepare Spring Cookies
Getting ready to make these spring cookies is a breeze, and I promise, you’ll enjoy every step along the way! Just follow these simple instructions, and soon you’ll have a beautiful batch of cookies to share (or keep all to yourself, no judgment here!).
Step-by-Step Instructions
- Preheat your oven: Start by preheating your oven to 350°F (175°C). This is an important step that ensures your cookies bake evenly!
- Cream the butter and sugar: In a large mixing bowl, cream together the softened butter and granulated sugar. Use a hand mixer or a sturdy wooden spoon until the mixture is light and fluffy. This step helps create that lovely texture we all adore in cookies!
- Add the egg and vanilla: Crack in the large egg and pour in the vanilla extract. Mix everything until well combined. It should be smooth and creamy – a real treat for the senses!
- Combine the dry ingredients: In another bowl, whisk together the all-purpose flour, baking powder, and salt. This helps evenly distribute the baking powder and salt throughout the flour, ensuring perfect cookies!
- Mix it all together: Gradually add the dry ingredients to the wet mixture. I like to add a little at a time, mixing gently until just combined. You don’t want to overmix; otherwise, your cookies might turn out tough!
- Fold in the sprinkles: Now comes the fun part! Gently fold in the colorful sprinkles, making sure they’re evenly distributed throughout the dough. This is where your cookies get their springtime flair!
- Drop the dough: Using a spoon or cookie scoop, drop spoonfuls of dough onto a lined baking sheet, leaving some space between each one. They’ll spread a bit, so give them room to grow!
- Bake your cookies: Pop the baking sheet into the preheated oven and bake for 10-12 minutes. Keep an eye on them; you want them to be lightly golden around the edges but still soft in the center. The aroma will be irresistible!
- Cool before serving: Once baked, remove the cookies from the oven and let them cool on the baking sheet for a few minutes before transferring them to a wire rack. This helps them firm up just a bit while keeping that delicious softness.
And there you have it! With just a few simple steps, you’ll have a tray full of delightful spring cookies that are ready to impress. Trust me, the anticipation of that first bite is totally worth it!
Why You’ll Love This Recipe
These spring cookies are not just delicious; they’re bursting with joy and perfect for any occasion! Here are some reasons you’ll fall in love with this recipe:
- Quick to make: With just 15 minutes of prep and 12 minutes of baking, you’ll have a batch of cookies ready in no time!
- Customizable: Feel free to switch up the colorful sprinkles! Use themed sprinkles for holidays or even chocolate chips for a twist.
- Perfect for gatherings: Whether it’s a picnic, birthday party, or just a sunny afternoon, these cookies are sure to bring smiles all around.
- Fun for kids: Let the little ones help with mixing and adding sprinkles. It’s a great way to create memories in the kitchen!
- Soft and chewy: These cookies strike the perfect balance between soft and chewy, making them irresistible with every bite.
Trust me, once you make these spring cookies, they’ll become a staple in your baking repertoire, celebrated by family and friends alike!
Tips for Success
Now that you’re all set to bake these delightful spring cookies, here are some pro tips to ensure they turn out perfectly every time. I’ve learned a few tricks along the way that really make a difference, and I can’t wait to share them with you!
- Chill the dough: For thicker cookies that hold their shape beautifully, consider chilling the dough for about 30 minutes before baking. Just wrap it in plastic wrap and pop it in the fridge. This step can help prevent spreading too much in the oven!
- Watch the baking time: Ovens can vary, so don’t just rely on the timer. Start checking your cookies at the 10-minute mark. You want them to be lightly golden but still soft in the center. Remember, they’ll continue to firm up as they cool!
- Line your baking sheets: Using parchment paper or silicone baking mats not only makes for easy cleanup but also prevents sticking. It’s a simple step that saves you from the heartbreak of broken cookies!
- Use a cookie scoop: For perfectly uniform cookies, a cookie scoop is a game-changer. It ensures that all your cookies are the same size and bake evenly, giving you a beautiful batch every time.
- Don’t overmix: When you’re combining the wet and dry ingredients, mix just until combined. Overmixing can lead to tough cookies, and nobody wants that! A few flour streaks in the batter are perfectly okay.
These little tips will help you achieve cookie perfection. I promise, once you master these, you’ll be the star of every spring gathering with your impressive baking skills!
Storage & Reheating Instructions
Now that you’ve whipped up a delightful batch of spring cookies, you’ll want to make sure they stay fresh and delicious for as long as possible. Here’s how to store any leftovers and some tips for reheating them if you’re lucky enough to have some left to enjoy later!
Storing your cookies: To keep your spring cookies fresh, store them in an airtight container at room temperature. This helps maintain their soft and chewy texture. If you have a lot of cookies, you can layer them between sheets of parchment paper to prevent sticking. They’ll stay good for about a week (if they last that long!).
For longer storage: If you want to keep them for more than a week, consider freezing them! Just let the cookies cool completely, then place them in a single layer on a baking sheet and freeze until solid. Once frozen, transfer them to a zip-top freezer bag or an airtight container. They can be stored in the freezer for up to three months! Just remember to label the bag with the date.
Reheating your cookies: If you’re craving that warm, fresh-baked taste, reheating is simple! For best results, preheat your oven to 350°F (175°C). Place the cookies on a baking sheet and warm them for about 5-8 minutes. This will bring back their softness and make those sprinkles sparkle again! If you’re in a hurry, you can pop one in the microwave for about 10-15 seconds, but keep an eye on it to avoid making it too gooey.
With these storage and reheating tips, your spring cookies will be just as delightful the next day (or month!) as they were straight out of the oven. Enjoy every last bite!
Nutritional Information
When you whip up a batch of these delightful spring cookies, it’s always nice to know what you’re indulging in! Here’s a quick look at the typical nutritional values for one cookie:
- Calories: 120
- Fat: 5g
- Saturated Fat: 3g
- Unsaturated Fat: 2g
- Trans Fat: 0g
- Cholesterol: 15mg
- Sodium: 50mg
- Carbohydrates: 18g
- Fiber: 0g
- Sugar: 10g
- Protein: 1g
Keep in mind, these values are estimates and can vary based on specific ingredients and portion sizes. But hey, a little sweetness never hurt anyone, right? Enjoy your cookies guilt-free, knowing they bring joy along with their tasty goodness!
FAQ Section
Got questions about these delightful spring cookies? Don’t worry, I’ve got you covered! Here are some common queries I’ve come across, along with my answers to help you bake with confidence.
- Can I use different types of sprinkles? Absolutely! You can customize your spring cookies with any sprinkles you like. Whether you choose pastel colors for Easter, fun shapes for a birthday, or even chocolate chips for an extra treat, feel free to get creative!
- What if I want to make these cookies gluten-free? You can definitely swap the all-purpose flour for a gluten-free flour blend. Just make sure to check that your blend includes xanthan gum or add a little to help with texture. Your cookies will still be delicious!
- Can I store the cookie dough for later? Yes, you can! If you want to make the dough ahead of time, just wrap it tightly in plastic wrap and store it in the fridge for up to 3 days or freeze it for up to 3 months. When you’re ready to bake, just let it thaw in the fridge and scoop out the dough as needed!
- How can I make these cookies softer? To achieve an even softer texture, try adding an extra egg yolk to the dough. You can also experiment with using brown sugar instead of granulated sugar, as it adds moisture and a chewy quality to your cookies.
- What’s the best way to enjoy these cookies? Honestly, any way you enjoy them is the best way! They’re delicious on their own, paired with a glass of milk, or even crumbled over ice cream for a fun dessert twist. The possibilities are endless!
Hopefully, these answers help you feel ready to dive into baking your spring cookies! If you have any other questions, feel free to reach out. Happy baking!
Print
Spring Cookies: 7 Irresistible Recipes to Brighten Your Day
- Total Time: 27 minutes
- Yield: 24 cookies 1x
- Diet: Vegetarian
Description
Delicious spring-themed cookies perfect for any occasion.
Ingredients
- 2 cups all-purpose flour
- 1 cup granulated sugar
- 1/2 cup unsalted butter, softened
- 1 large egg
- 1 teaspoon vanilla extract
- 1/2 teaspoon baking powder
- 1/2 teaspoon salt
- 1 cup colorful sprinkles
Instructions
- Preheat your oven to 350°F (175°C).
- In a bowl, cream the butter and sugar together.
- Add the egg and vanilla, mixing well.
- In another bowl, combine flour, baking powder, and salt.
- Gradually add the dry ingredients to the wet mixture.
- Fold in the sprinkles.
- Drop spoonfuls of dough onto a baking sheet.
- Bake for 10-12 minutes until lightly golden.
- Let cool before serving.
Notes
- Store cookies in an airtight container.
- Use different sprinkles for variety.
- Chill dough for 30 minutes for thicker cookies.
- Prep Time: 15 minutes
- Cook Time: 12 minutes
- Category: Dessert
- Method: Baking
- Cuisine: American
Nutrition
- Serving Size: 1 cookie
- Calories: 120
- Sugar: 10g
- Sodium: 50mg
- Fat: 5g
- Saturated Fat: 3g
- Unsaturated Fat: 2g
- Trans Fat: 0g
- Carbohydrates: 18g
- Fiber: 0g
- Protein: 1g
- Cholesterol: 15mg
Keywords: spring cookies