
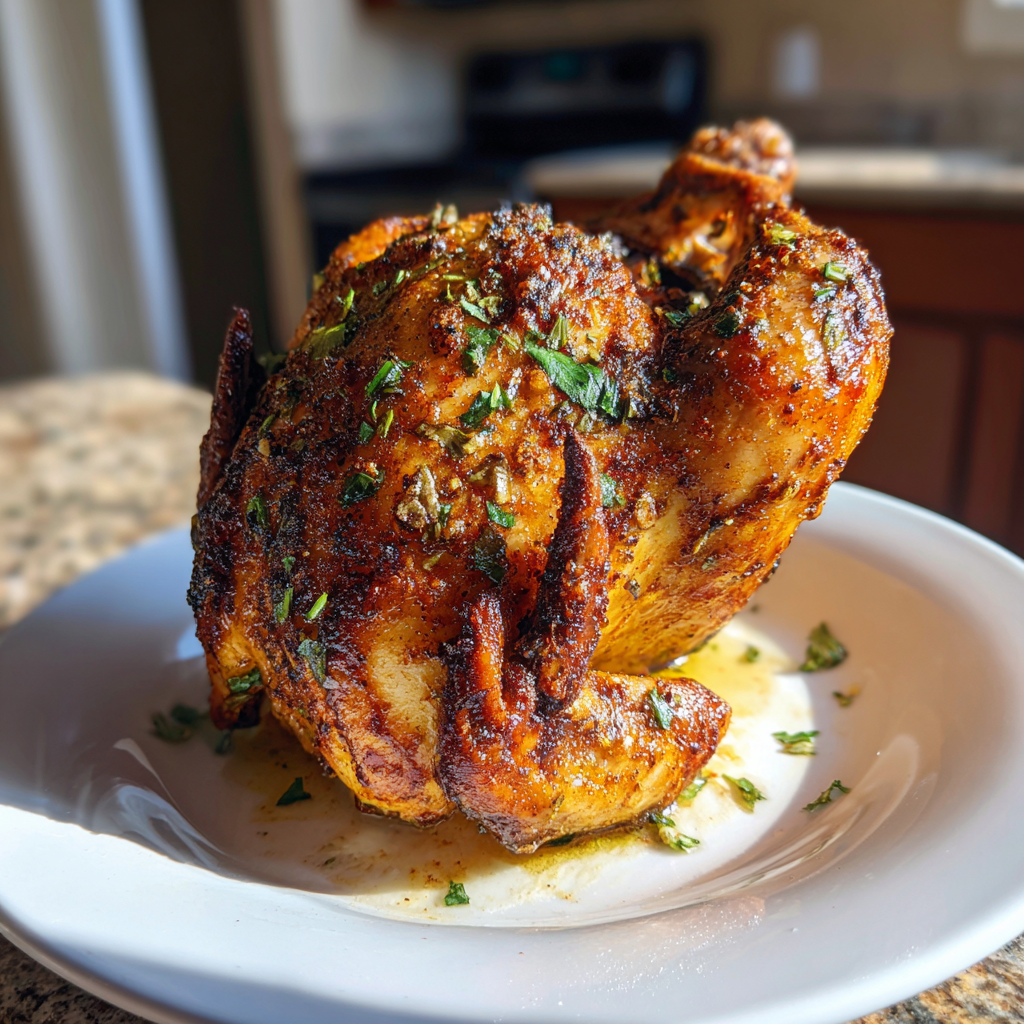
Beer-Can Chicken: 5 Steps to Juicy Flavor Explosion
Beer-Can Chicken is a culinary delight that promises a unique flavor experience. This method not only saves time but also delivers juicy, tender chicken bursting with flavor. Have you ever wondered how to achieve that perfectly moist and flavorful chicken that’s the hit of any barbecue? Imagine the aroma wafting through the air as the chicken cooks, its skin turning golden and crispy, while the inside remains succulent and tender. The mingling scents of herbs, spices, and beer create a mouthwatering invitation for friends and family to gather around the grill.
As the chicken roasts upright on the grill, the can of beer infuses moisture and flavor from within, resulting in a dish that is both visually stunning and irresistibly tasty. The crispy skin crackles as it cools, and the first bite reveals a juicy interior that is seasoned to perfection. Each mouthful is a delightful blend of savory spices, enhanced by the rich undertones of your chosen beer. This recipe will not only satisfy your taste buds but also leave you with plenty of leftovers for sandwiches, salads, or simply snacking.
Moreover, the ingredients used in Beer-Can Chicken are not only delicious but also packed with health benefits. For instance, **chicken** is a great source of **protein**, which is essential for muscle growth and repair. Additionally, the **paprika** adds a vibrant color and contains **Vitamin A**, promoting healthy vision and skin. **Olive oil** is rich in healthy fats known to support heart health and reduce inflammation. Each spice used, including **garlic powder** and **onion powder**, not only enhances flavor but also offers various health benefits, such as boosting immunity and aiding digestion. Surprisingly, did you know that drinking beer in moderation can improve cardiovascular health due to its antioxidant properties? It’s true!
This Beer-Can Chicken recipe is not just any ordinary chicken dish; it stands out due to its unique cooking technique. By using a can of beer, you are creating a steaming effect that ensures the chicken stays moist throughout the cooking process. This method has been a favorite among grill enthusiasts for years, making it a must-try for both seasoned cooks and beginners. The recipe works well for family gatherings, BBQs, and even special occasions where you want to impress your guests without spending hours in the kitchen.
In summary, this recipe requires minimal prep time of just 15 minutes, followed by a cooking time of 1 hour and 15 minutes. It serves a family of four and is suitable for beginner cooks looking to elevate their grilling game. Whether it’s a weeknight dinner or a weekend feast, Beer-Can Chicken fits perfectly into any meal plan.
What is Beer-Can Chicken
Beer-Can Chicken is a grilling technique where a whole chicken is cooked upright on a grill using a can of beer inserted into its cavity. This method allows the beer to steam the chicken from the inside, resulting in incredibly moist meat and crispy skin. The beer not only adds moisture but also infuses the chicken with a deep, rich flavor that is hard to replicate using traditional roasting methods.
Why You Will Love This Recipe
- Delivers juicy, tender chicken that is full of flavor.
- Easy to prepare, requiring only 15 minutes of active cooking time.
- Ideal for outdoor gatherings and impressing guests.
- Flexible with beer options; use your favorite brew for unique flavors.
- Minimal cleanup, as you can grill and serve directly from the grill.
Ingredients You Need
- 1 whole chicken (about 4-5 lbs) – The star ingredient that will absorb all the flavors.
- 1 can of beer (your choice) – Adds moisture and flavor; choose a lager for a lighter taste or a stout for richness.
- 2 tablespoons olive oil – Helps the spices adhere and promotes crispy skin.
- 2 tablespoons paprika – Adds color and a mild sweetness.
- 1 tablespoon garlic powder – Enhances the savory profile.
- 1 tablespoon onion powder – Balances flavors with a hint of sweetness.
- 1 tablespoon salt – Essential for flavor enhancement.
- 1 tablespoon black pepper – Adds a touch of heat and depth.
- 1 teaspoon cayenne pepper (optional) – For those who enjoy a spicy kick.
- Fresh herbs (like rosemary or thyme) – Serve as a garnish and adds a fragrant touch.
How to Make Beer-Can Chicken Step by Step
- Preheat your grill to medium-high heat (around 375°F). Ensure you have a direct and indirect heat zone for cooking.
- In a small bowl, mix the olive oil, paprika, garlic powder, onion powder, salt, black pepper, and cayenne pepper to create a seasoning rub.
- Pat the chicken dry with paper towels and rub the seasoning mixture all over the chicken, ensuring it’s evenly coated.
Pro Tip: Drying the chicken well helps achieve that crispy skin.
- Open the can of beer and take a few sips (or pour out a bit) to create space. Insert the can into the chicken’s cavity, ensuring it stands upright.
- Place the chicken on the grill over the indirect heat zone and close the lid. Cook for 1 hour and 15 minutes or until the internal temperature reaches 165°F.
Pro Tip: Use a meat thermometer to check the temperature for perfect doneness.
Expert Tips for Best Results
- Choose a flavorful beer that complements your seasoning.
- Let the chicken sit at room temperature for 30 minutes before cooking to ensure even cooking.
- Experiment with different spices, such as cumin or chili powder, for a unique twist.
- Consider using a vertical roasting rack for stability.
- For added flavor, stuff the chicken cavity with aromatics like onion, garlic, or lemon.
- Rest the chicken for 10 minutes before carving to allow juices to redistribute.
Variations and Substitutions
- Use a **gluten-free beer** for those with dietary restrictions.
- For a **Mediterranean twist**, add herbs like oregano and lemon juice to the beer.
- Try with a **spicy rub** for a kick by increasing the cayenne pepper or using a spicy beer.
- For a **smoky flavor**, add wood chips to the grill or use a smoker.
How to Serve and Store
For serving, pair the Beer-Can Chicken with grilled vegetables, a fresh salad, or corn on the cob for a complete meal. Storage is easy; leftover chicken can be kept in the fridge for up to 4 days. For longer storage, you can freeze the meat for up to 3 months. Reheat in the oven at 350°F until warmed through for the best flavor and texture.
Frequently Asked Questions
Can I use a different beverage instead of beer?
Yes, you can use soda, cider, or any liquid that can provide moisture and flavor.
How do I know when the chicken is done?
The chicken is done when the internal temperature reaches 165°F at the thickest part.
What type of grill is best for Beer-Can Chicken?
A charcoal or gas grill works well; just ensure you can create indirect heat.
Can I make this recipe in the oven?
Yes, you can bake it in the oven at 375°F using a can or a vertical roaster.
Is Beer-Can Chicken healthy?
Yes, it is a healthier option compared to fried chicken, especially when using lean cuts and minimal oil.
Can I brine the chicken before cooking?
Yes, brining adds flavor and moisture but is not necessary for this recipe.
In conclusion, Beer-Can Chicken is an exceptional dish that guarantees juicy meat and a crispy skin, making it a family favorite. You’ll enjoy the health benefits from the chicken and spices while impressing your guests with this unique cooking method. Try this recipe today and leave a comment below!
[tasty-recipe id=”25233″]