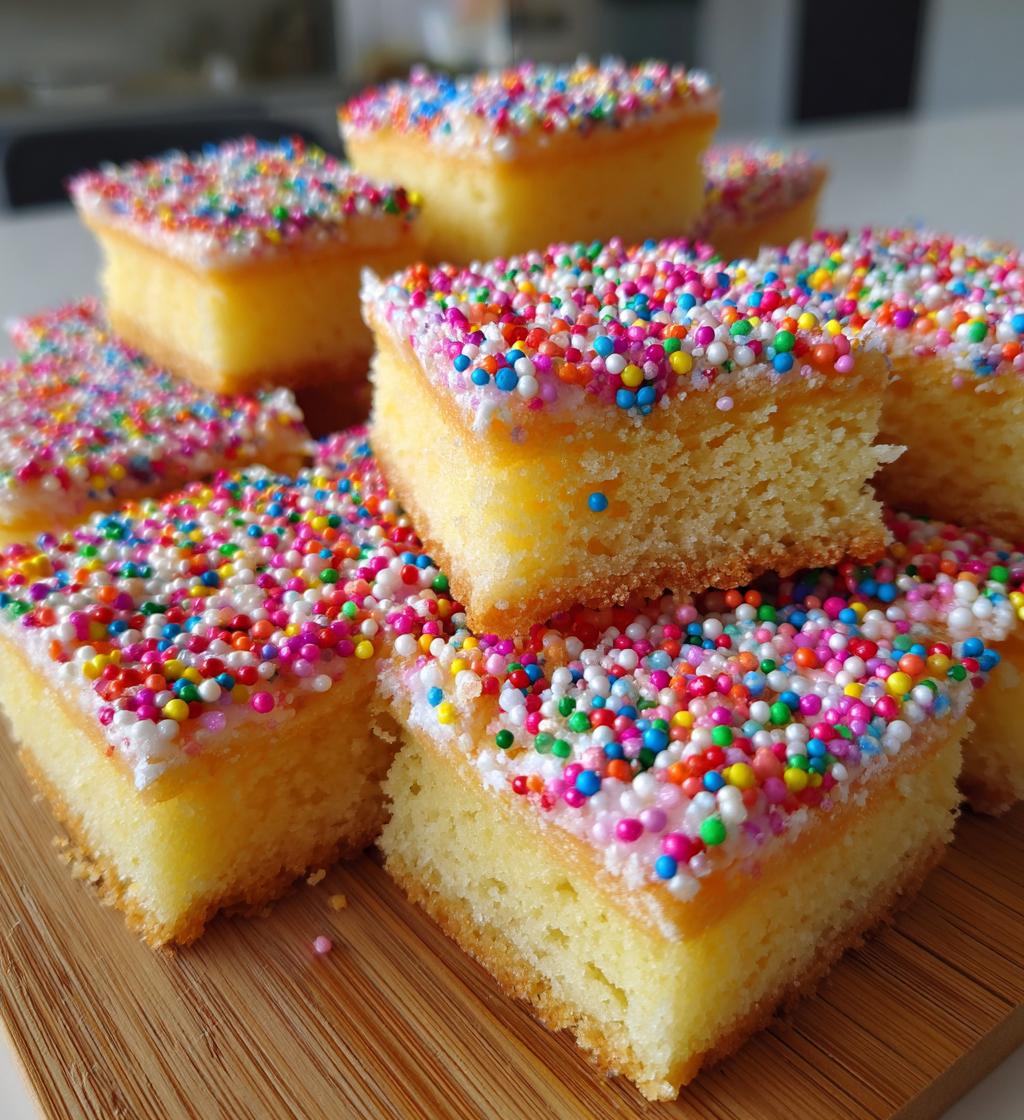
Easter sweets are the ultimate treat to brighten up your holiday celebrations! With their vibrant colors and delightful flavors, these tasty little squares bring a sense of joy and festivity to any gathering. I can’t help but smile when I think about how these sweets can make a table look so cheerful and inviting. With just a handful of simple ingredients, you’ll whip up a batch of these colorful delights in no time, perfect for an Easter brunch or an afternoon family get-together.
Trust me, there’s something truly special about making these Easter sweets together with family. The laughter, the sprinkles flying everywhere, and the sweet aroma wafting through the kitchen—it’s all part of the experience! So, let’s dive into this easy recipe that guarantees deliciousness and a whole lot of smiles. You’ll love how quick and fun it is to create these festive desserts that are sure to impress your loved ones!
Ingredients List
Gathering the right ingredients is the first step to making these delightful Easter sweets! Here’s what you’ll need:
- 1 cup sugar
- 1/2 cup butter, softened
- 2 cups all-purpose flour
- 1/2 cup milk
- 1 teaspoon vanilla extract
- 1/4 cup colorful sprinkles
Make sure your butter is nice and soft; it’ll make mixing so much easier! And don’t be shy with those sprinkles—they’re what make these sweets truly festive! Ready? Let’s get baking!
How to Prepare Easter Sweets
Now that you have all your ingredients ready, let’s jump into the fun part: making these delightful Easter sweets! Follow these simple steps, and you’ll have a batch of colorful treats in no time.
Step 1 – Preheat the Oven
First things first, preheat your oven to 350°F (175°C). Preheating is super important because it helps your sweets bake evenly. If you skip this step, you might end up with gooey centers or overly dry edges. So, let that oven warm up while you mix your ingredients!
Step 2 – Mix Ingredients
In a large mixing bowl, combine the sugar and softened butter. Use a sturdy spoon or a hand mixer to cream them together until the mixture is nice and creamy—think fluffy clouds! You want it to be smooth and pale, which usually takes about 2-3 minutes of mixing. This step adds air to the batter, making your sweets light and delightful!
Step 3 – Combine Dry and Wet Ingredients
Next, it’s time to add the flour, milk, and vanilla extract. Pour in the flour first, followed by the milk and vanilla. Stir gently until everything is well-combined. Don’t overmix—just enough to get rid of any dry flour. You want a smooth batter, but some small lumps are totally okay. This is where the magic starts to happen!
Step 4 – Fold in Sprinkles
Now, let’s add the fun part—those colorful sprinkles! Gently fold them into the batter using a spatula. Be careful not to overmix, or you might end up with a rainbow swirl instead of distinct sprinkles! We want those vibrant bursts of color in every bite, so just a few gentle folds will do.
Step 5 – Bake the Mixture
Pour the batter into a greased baking dish, spreading it out evenly. Pop it in the preheated oven and bake for about 25-30 minutes. You’ll know they’re done when the edges turn a lovely golden brown and a toothpick inserted in the center comes out clean. The aroma that fills your kitchen during this time? Pure bliss!
Step 6 – Cooling and Cutting
Once they’re baked to perfection, take your Easter sweets out of the oven and let them cool in the dish for about 10-15 minutes. This cooling time is crucial; it helps the texture firm up a bit. After that, transfer them to a wire rack to cool completely. Once cool, grab a sharp knife and cut them into squares. Serve those colorful delights and watch the smiles appear!
Tips for Success
To make sure your Easter sweets turn out absolutely perfect, I’ve got some handy tips to share! These little nuggets of wisdom will help you navigate the baking process like a pro.
- Check your oven temperature: Every oven is a bit different, so it’s a good idea to invest in an oven thermometer. If your oven runs hot or cold, you might need to adjust the baking time or temperature slightly to get those sweets just right!
- Experiment with sprinkles: Feeling adventurous? Switch up the sprinkles! You can use chocolate chips, crushed candies, or even dried fruit for a different twist. Just make sure to keep the overall measurement the same, so your batter stays balanced.
- Don’t skip the greasing: Always grease your baking dish well! I like to use butter or cooking spray to ensure those colorful squares come out easily without any sticky drama. Trust me, there’s nothing worse than losing half of your treats to the pan!
- Let them cool completely: I know it’s tempting to dive in right away, but letting your sweets cool completely ensures they hold their shape better and are easier to cut. Plus, the flavors get a chance to meld together beautifully!
- Storing leftovers: If you have any leftovers (which is rare, but hey, it happens!), store them in an airtight container at room temperature for up to a week. If they last that long! They also freeze well, so you can enjoy your Easter sweets later on.
Following these tips will help you create a batch of Easter sweets that are not just visually stunning but also deliciously satisfying. Happy baking!
Nutritional Information
Here’s the estimated nutritional breakdown for each square of these delightful Easter sweets. Keep in mind that these values can vary slightly based on specific ingredients used, but they should give you a good idea of what to expect!
- Calories: 150
- Total Fat: 7g
- Saturated Fat: 4g
- Unsaturated Fat: 2g
- Trans Fat: 0g
- Sodium: 50mg
- Total Carbohydrates: 20g
- Fiber: 1g
- Protein: 2g
- Cholesterol: 30mg
- Sugar: 10g
These sweets are a fun treat to enjoy during Easter celebrations, and with a balance of sweetness and flavor, they’re sure to be a hit with everyone! Just remember to enjoy them in moderation, and you’ll be good to go!
FAQ Section
Got questions about making these delightful Easter sweets? I’ve got you covered! Here are some common queries that pop up when baking these festive treats:
- Can I use different types of sprinkles? Absolutely! Feel free to swap out the colorful sprinkles for chocolate chips, mini marshmallows, or even crushed candy. Just remember to keep the measurement the same to maintain that perfect batter consistency!
- How should I store leftover Easter sweets? If by some miracle you have leftovers, store them in an airtight container at room temperature for up to a week. They also freeze nicely! Just wrap them well and pop them in the freezer, and you can enjoy your treats later on.
- What can I use instead of butter? If you’re looking for a dairy-free option, you can substitute the butter with coconut oil or a vegan butter alternative. Just make sure it’s softened before mixing to get that creamy texture!
- Can I make these sweets gluten-free? Yes, you can! Simply use a 1-to-1 gluten-free flour blend in place of regular all-purpose flour. The texture might be a tad different, but they’ll still turn out delicious!
- How can I tell when my Easter sweets are done baking? Keep an eye on them! They’re done when the edges are golden brown and a toothpick inserted in the center comes out clean. You’ll also notice a lovely smell wafting through your kitchen—such a good sign!
These answers should help you navigate your baking adventure with confidence! If you have any more questions, don’t hesitate to reach out. Happy baking and enjoy those sweet Easter celebrations!
Why You’ll Love This Recipe
- Quick and Easy: With just a handful of ingredients and simple steps, you can whip up these delightful Easter sweets in no time—perfect for those last-minute celebrations!
- Colorful and Festive: The vibrant sprinkles not only make them visually appealing but also add a fun touch to any Easter gathering, making them a hit with kids and adults alike!
- Endless Customization: You can easily switch up the sprinkles or even add your favorite mix-ins, like chocolate chips or nuts, to create your own unique version of these treats.
- Perfect for Sharing: These sweets are great for potlucks, family gatherings, or just to surprise your loved ones. Everyone will love the cheerful colors and delicious flavors!
- Deliciously Satisfying: With a lovely balance of sweetness and a soft texture, these Easter sweets are sure to hit the spot and leave everyone wanting more!
Storage & Reheating Instructions
Storing your delightful Easter sweets properly will help them stay fresh and tasty for days! Here’s how I like to do it:
- Storing Leftovers: If you find yourself with any leftovers (which is a rare treat!), make sure to let them cool completely first. Then, place them in an airtight container. They’ll stay fresh at room temperature for up to a week. You can also pop them in the fridge if you prefer, but they’ll be just fine on the counter!
- Freezing for Later: Want to save some for a future celebration? These sweets freeze beautifully! Just wrap each piece in plastic wrap and then place them in a freezer-safe bag or container. They can stay in the freezer for up to three months. When you’re ready to enjoy them, simply thaw them at room temperature for a couple of hours.
- Reheating Tips: If you want to enjoy your Easter sweets warm, I recommend popping them in the microwave for about 10-15 seconds. This gives them a nice warm-up without drying them out. If you prefer a bit of crispiness, you can also reheat them in a toaster oven at a low temperature for a few minutes. Just keep an eye on them so they don’t get too toasty!
Following these storage and reheating instructions will ensure that every bite of your Easter sweets is just as delicious as the first! Enjoy every colorful morsel!
Serving Suggestions
When it comes to serving your delightful Easter sweets, the options are as colorful and festive as the treats themselves! Here are some fun ideas to elevate your dessert table and create a memorable experience for your guests:
- Pair with Fresh Fruit: A beautiful fruit platter filled with strawberries, blueberries, and sliced citrus not only adds a fresh touch but also complements the sweetness of your Easter sweets perfectly. The bright colors make for a stunning presentation!
- Serve with Whipped Cream: A dollop of freshly whipped cream can elevate these treats to a whole new level. You can even add a hint of vanilla or almond extract to the cream for an extra pop of flavor that pairs beautifully with the sprinkles!
- Accompany with Ice Cream: Who doesn’t love a scoop of ice cream? Vanilla or rainbow sherbet would be a fantastic pairing with your Easter sweets. The contrast of temperature and texture will have everyone reaching for seconds!
- Include Hot Beverages: Brew up some delicious coffee, hot chocolate, or even a refreshing iced tea to serve alongside your sweets. The warmth of the drinks balances the sweetness of the desserts and makes for a cozy gathering.
- Add a Touch of Decor: Consider serving these colorful treats on a festive platter or cake stand, adorned with spring flowers or Easter-themed decorations. It adds that extra touch of joy and festivity to your table!
These serving suggestions will not only enhance the overall meal experience but also create a cheerful atmosphere that celebrates the spirit of Easter. Enjoy the smiles and laughter as everyone indulges in these delightful sweets together!
Print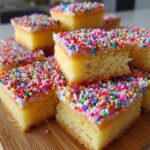
Easter sweets: 5 Joyful Treats for a Festive Celebration
- Total Time: 45 minutes
- Yield: 12 servings 1x
- Diet: Vegetarian
Description
Delicious and colorful sweets perfect for Easter celebrations.
Ingredients
- 1 cup sugar
- 1/2 cup butter
- 2 cups flour
- 1/2 cup milk
- 1 teaspoon vanilla extract
- 1/4 cup sprinkles
Instructions
- Preheat the oven to 350°F (175°C).
- In a bowl, mix sugar and butter until creamy.
- Add flour, milk, and vanilla extract; stir until combined.
- Fold in sprinkles gently.
- Pour the mixture into a greased baking dish.
- Bake for 25-30 minutes or until golden.
- Let cool before cutting into squares.
Notes
- Store leftovers in an airtight container.
- Feel free to use different types of sprinkles.
- Adjust baking time based on your oven.
- Prep Time: 15 minutes
- Cook Time: 30 minutes
- Category: Desserts
- Method: Baking
- Cuisine: American
Nutrition
- Serving Size: 1 square
- Calories: 150
- Sugar: 10g
- Sodium: 50mg
- Fat: 7g
- Saturated Fat: 4g
- Unsaturated Fat: 2g
- Trans Fat: 0g
- Carbohydrates: 20g
- Fiber: 1g
- Protein: 2g
- Cholesterol: 30mg
Keywords: Easter sweets, holiday treats, festive desserts